
Install Cockpit
apt-get install cockpitInstall Cockpit application to manage virtual machines
apt-get install cockpit-machinesInstall Virtual Viewer to be able to view virtual machines
apt-get install virt-viewerInstall KVM Packages
apt-get install -y qemu qemu-kvm libvirt-daemon libvirt-clients bridge-utils virt-managerInstall OVMF Package
apt-get install ovmfEnable and start Libvirtd
systemctl enable libvirtd
systemctl start libvirtd
systemctl status libvirtd
Use the command bellow to check if the KVM module is loaded.
lsmod | grep -i kvm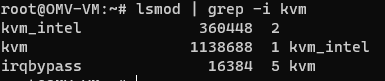
Setting up KVM Bridge
To bring up the network interfaces, execute the “ip a” command.

“eth0” will be used to bridge to the LAN.
To modify the bridge.conf file, use the following command:
nano /etc/sysctl.d/bridge.confInside the bridge.conf file, insert these three lines:
net.bridge.bridge-nf-call-ip6tables=0
net.bridge.bridge-nf-call-iptables=0
net.bridge.bridge-nf-call-arptables=0
Afterwards, create a configuration file for the provided rules to become effective:
nano /etc/udev/rules.d/99-bridge.rulesInsert this line inside the 99-bridge.rules
ACTION=="add", SUBSYSTEM=="module", KERNEL=="br_netfilter", RUN+="/sbin/sysctl -p /etc/sysctl.d/bridge.conf"Create the Netplan Configuration File by using the following command:
nano /etc/netplan/00-installer-config.yamlAdd this configuration inside the yaml file.
network:
  ethernets:
    eth0:
      dhcp4: false
      dhcp6: false
  bridges:
    br0:
      interfaces: [eth0]
      addresses: [192.168.1.160/24] #This can be any IP address
      gateway4: 192.168.1.1
      mtu: 1500
      nameservers:
        addresses: [8.8.8.8, 1.1.1.1]
      parameters:
        stp: true
        forward-delay: 4
      dhcp4: no
      dhcp6: no

  version: 2
Reboot the machine, and after the reboot, execute the ‘ip a’ command. You should now be able to observe the ‘br0’ bridge. Additionally, running ‘brctl show br0’ will provide information about the ‘br0’ bridge, and you can find ‘eth0’ listed under its interfaces.

Next, configure the KVM to use the bridge network. Create an XML file by running the nano command and input the bridge configuration details as shown below:
nano host-bridge.xmlEnter the following configuration in the xml file:
<network>
		  <name>host-bridge</name>
		  <forward mode="bridge"/>
		  <bridge name="br0"/>
		</network>
To utilize the freshly established bridge with KVM,execute the following command:
Defines a new virtual network with specified settings from ‘host-bridge.xml’.
virsh net-define host-bridge.xmlStarts the ‘host-bridge’ virtual network for use by virtual machines.
virsh net-start host-bridgeConfigures the ‘host-bridge’ network to start automatically at system boot.
virsh net-autostart host-bridgeLists all virtual networks, displaying their statuses and names, including both active and inactive networks
virsh net-list --all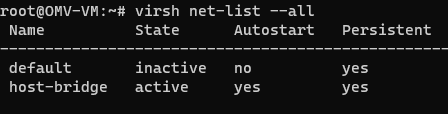
Home Assistant VM Setup
Start by downloading the Home Assistant Image directly onto the host machine.
Visit the following URL: https://www.home-assistant.io/installation/alternative
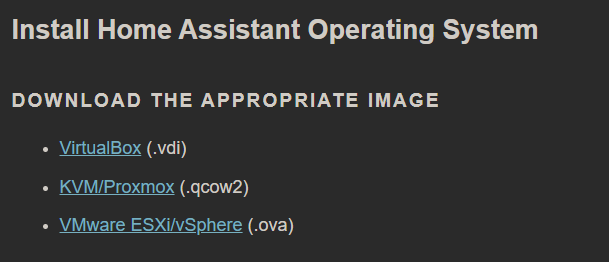
Locate the link for KVM/Proxmox on that page and use the “wget” command to download the image. Save it to the directory “/var/lib/libvirt/images/”. Here’s the command:
sudo wget https://github.com/home-assistant/operating-system/releases/download/10.5/haos_ova-10.5.qcow2.xz -P /var/lib/libvirt/images/
Once the image is downloaded, it needs to be extracted. Navigate to the directory where you downloaded the image and execute the extraction command. If the required software is not already installed, you can install it with the following command:
sudo apt install xz-utilsExtract the downloaded image using this command:
cd /var/lib/libvirt/images/
unxz haos_ova-10.5.qcow2.xz
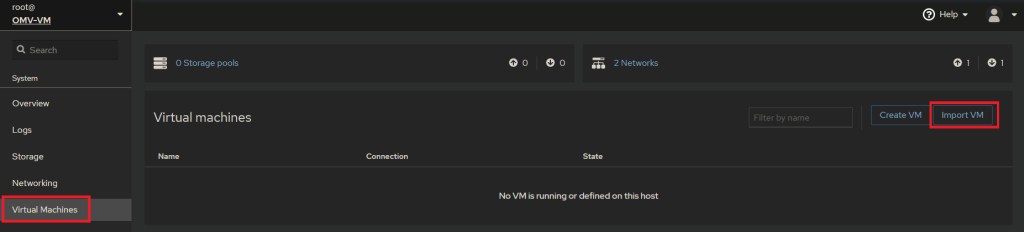
After successfully extracting the image, access the Cockpit interface.
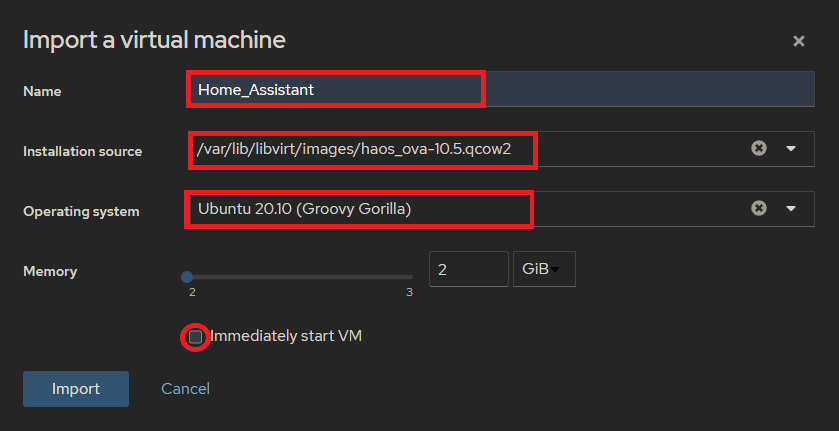
In Cockpit, go to “Virtual Machines” and select “Import VM.”
Enter the Home Assistant details.
Specify the path where you extracted the Home Assistant Image.
Choose a random operating system (as the specific OS isn’t critical for this task).
Make sure to uncheck the option that prevents the VM from starting immediately
Return to the SSH session and proceed to edit the VM by executing the following command to edit its template:
virsh edit "Home_Assistant"Replace “Home_Assistant” with the actual name of your VM if it differs from the one used here.
In the configuration file of the VM find the “OS” line and insert the following lines:
<loader readonly="yes" type="pflash">/usr/share/OVMF/OVMF_CODE.fd</loader>
<nvram>/var/lib/libvirt/qemu/nvram/hassio_VARS.fd</nvram>
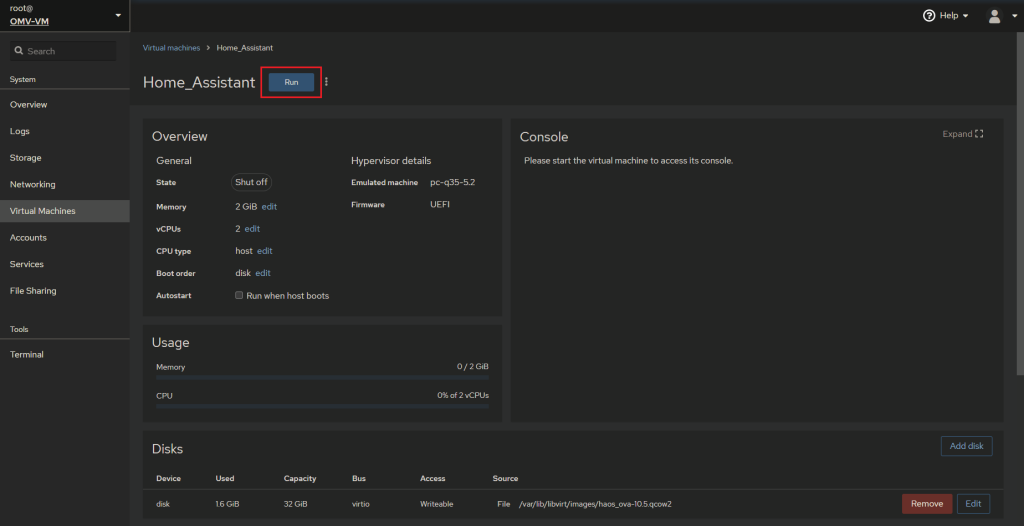
Return to the Cockpit interface, choose the Home Assistant VM, and click the “Run” button. After a brief moment, it should begin loading.
Once Home Assistant has completed loading, you will observe the assigned IP address along with the remaining details.

References
https://community.home-assistant.io/t/installation-on-opensuse-kvm-fails/583153
https://community.home-assistant.io/t/ha-os-installation-fails-on-uefi-in-qemu-kvm/435509