Data exfiltration from a compromised Microsoft 365 mailbox is possible through a few specific channels. One approach involves configuring a forwarding rule to redirect data to an external mailbox. Another potential risk is the improper use of automatic replies (Out of Office), which can be exploited as part of a larger social engineering or phishing scheme, aimed at extracting information or deceiving users.To combat these risks, it’s essential to utilize Microsoft 365 hardening techniques, particularly in the Exchange Admin Center, by implementing robust mail flow rules.
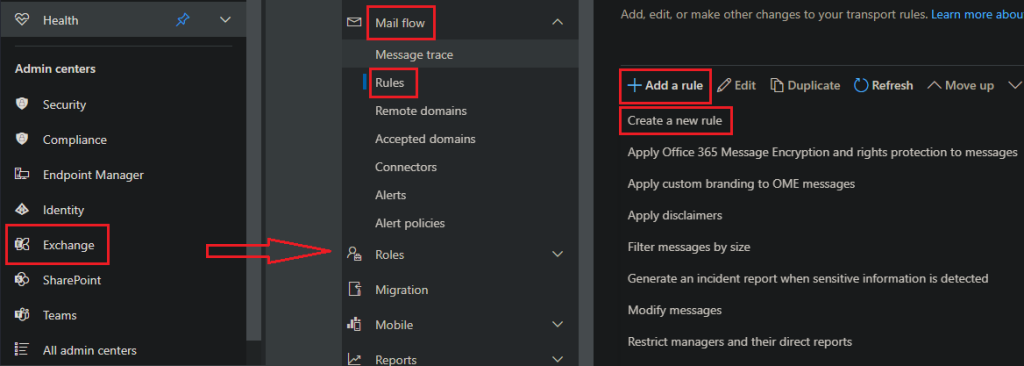
Accessing Exchange Admin Center for Mail Flow Rule Creation
- Sign in to the Microsoft 365 Admin Center.
- Navigate to “Admin centers” and select “Exchange.”
- In the Exchange Admin Center, focus on the “Mail Flow” options.
- Go to the “Rules” tab within “Mail Flow.”
- Click the “+” (plus) sign to create a new rule.
Creating a Rule to Block Automatic Replies
Step 1: Naming Your Rule
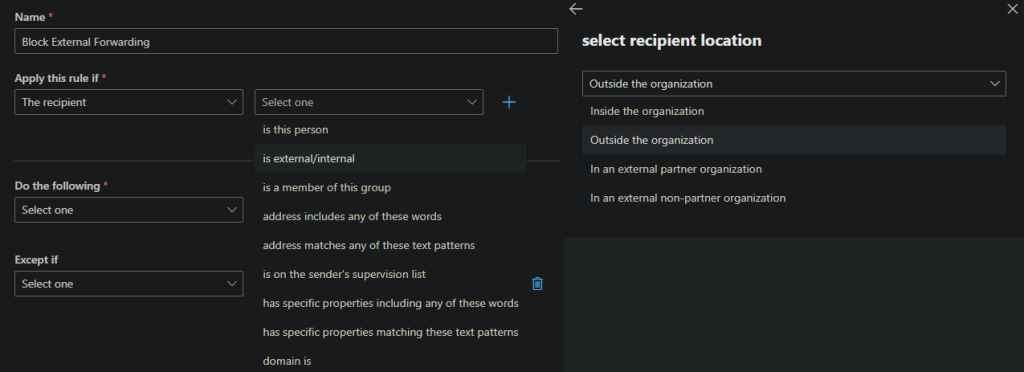
Begin by assigning a descriptive name to your rule in the “Name” field.
Step 2: Creating Rule Conditions
You’ll need to establish two specific conditions:
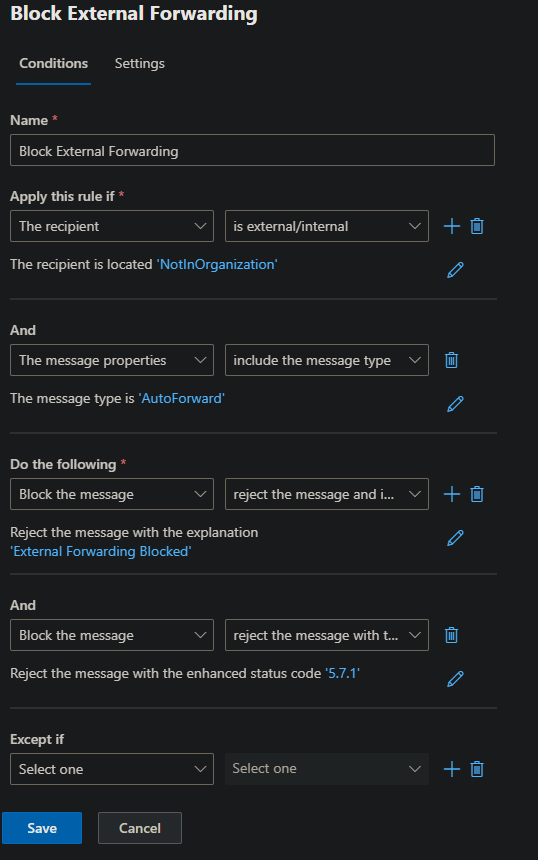
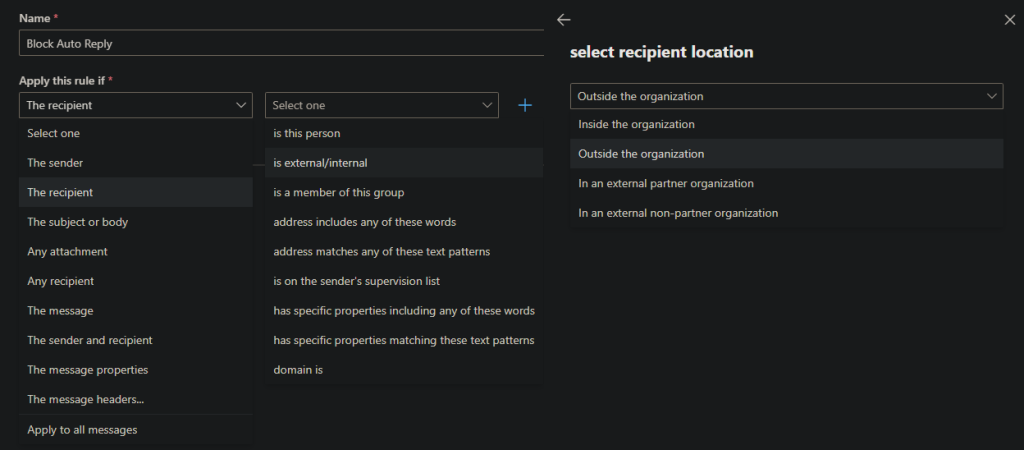
a. Under “Apply this rule if,” select the condition “The Recipient” >”Is external/internal” > “Outside the organization.”
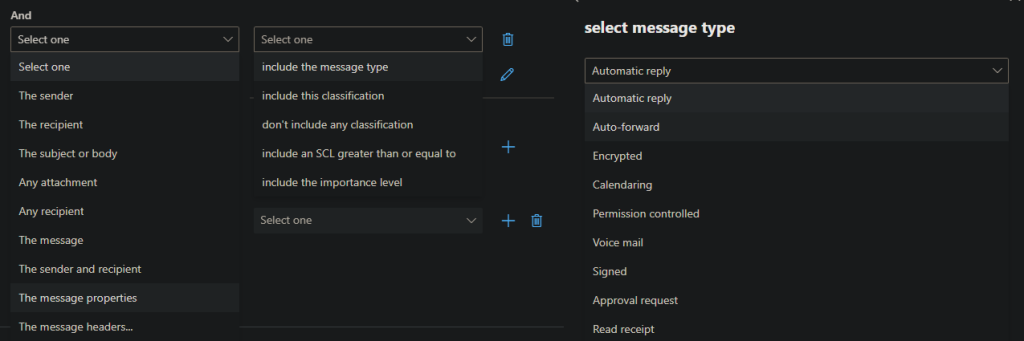
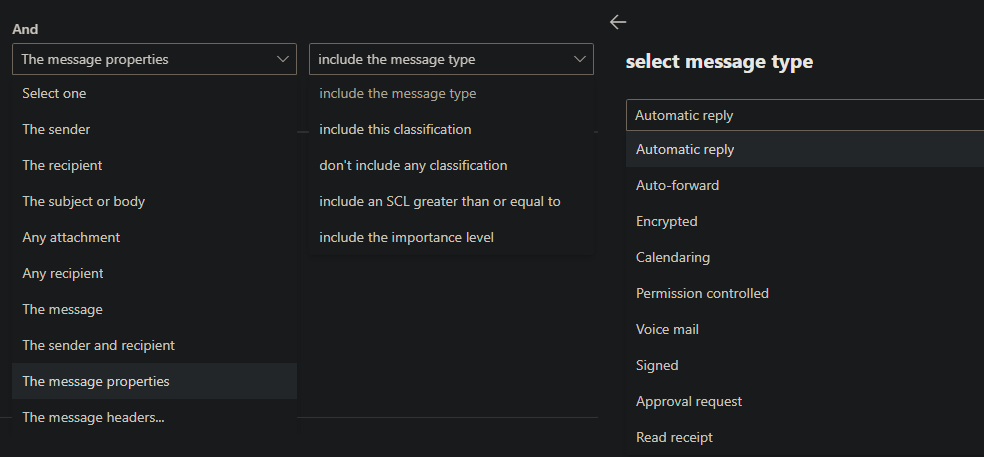
b. To create the second condition, click the “+” (plus) button and choose “Message properties” > “include the message type” > “Auto-Forward.”
Step 3: Configuring the Action
Now, let’s configure the action to block forwarding:
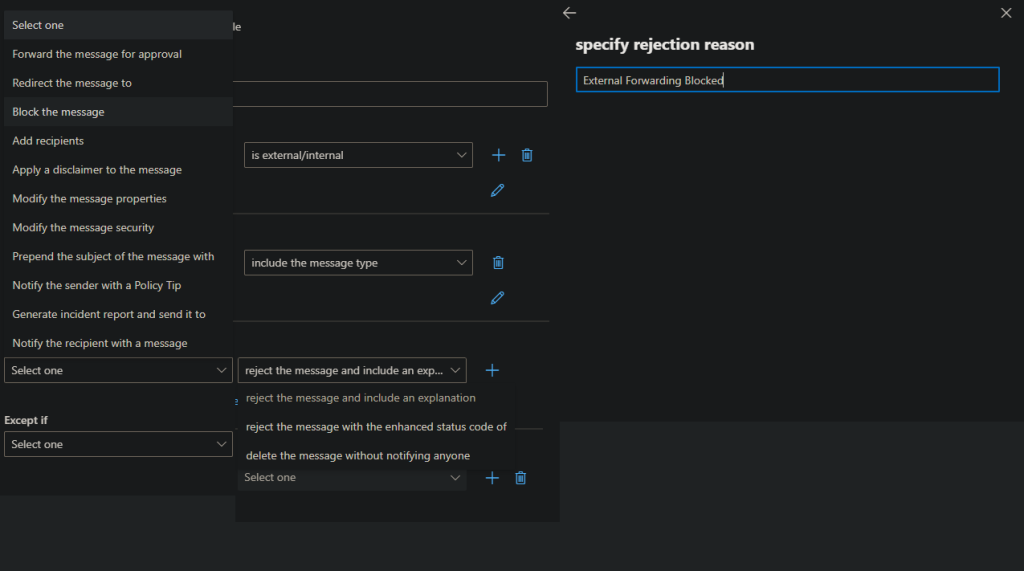
a. Under “Do the following,” choose “Block the message.”
b. In the “Properties” section, click on “Reject the message and provide an explanation.” Here, you can draft a message such as “External Forwarding Blocked by Organization.”
Step 4: Review and Save the Rule
Before finalizing, it’s crucial to review your rule to ensure that it’s correctly configured. Once you’re satisfied with the settings:
a. Click the “Save” button to save the rule.
Step 5: Enabling the Rule
By default, rules are enabled when created. However, it’s good practice to double-check:
a. Make sure the rule is enabled so that it takes effect in your email system.
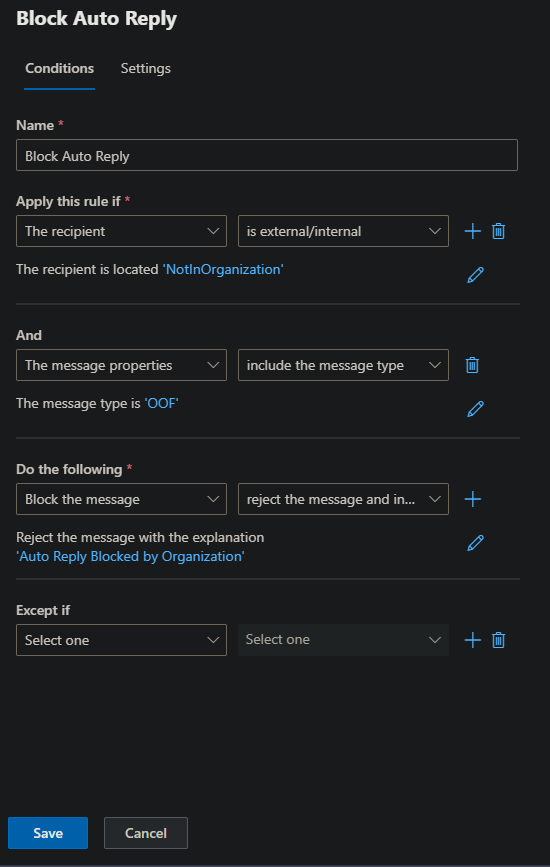
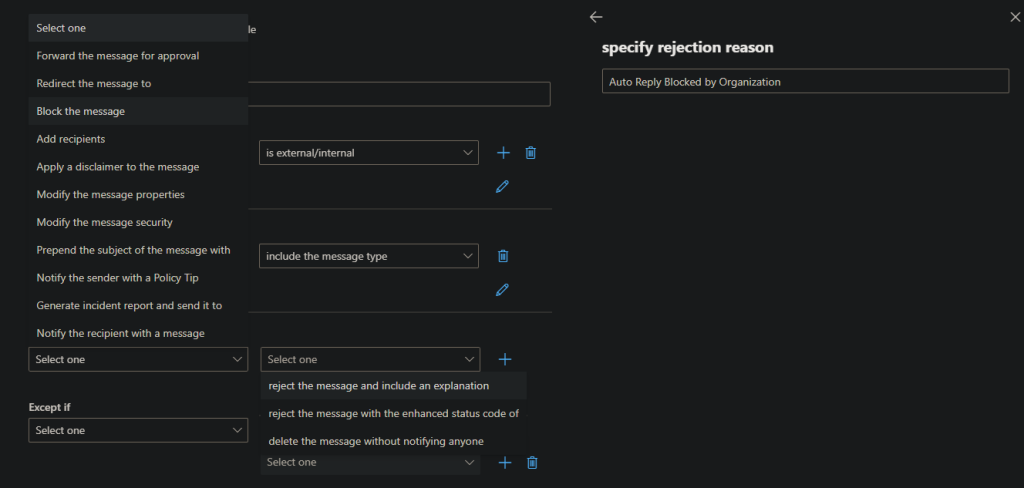
Creating a Rule to Block Automatic Replies
Step 1: Naming Your Rule
Begin by assigning a descriptive name to your rule in the “Name” field.
Step 2: Creating Rule Conditions
You’ll need to establish two specific conditions:
a. Under “Apply this rule if,” select the condition “The Recipient” >”Is external/internal” > “Outside the organization.”
b. To create the second condition, click the “+” (plus) button and choose “Message properties” > “include the message type” > “Auto-Forward.”
Step 3: Configuring the Action
Now, let’s configure the action to block forwarding:
a. Under “Do the following,” choose “Block the message.”
b. In the “Properties” section, click on “Reject the message and provide an explanation.” Here, you can draft a message such as “Auto Reply Blocked by Organization.”
Step 4: Review and Save the Rule
Before finalizing, it’s crucial to review your rule to ensure that it’s correctly configured. Once you’re satisfied with the settings:
a. Click the “Save” button to save the rule.
Step 5: Enabling the Rule
By default, rules are enabled when created. However, it’s good practice to double-check:
a. Make sure the rule is enabled so that it takes effect in your email system